What You Should Consider When Purchasing Moving Boxes for Storage

To help you select the right types of moving boxes, we’ve come up with different moving boxes you can select, and their differences.

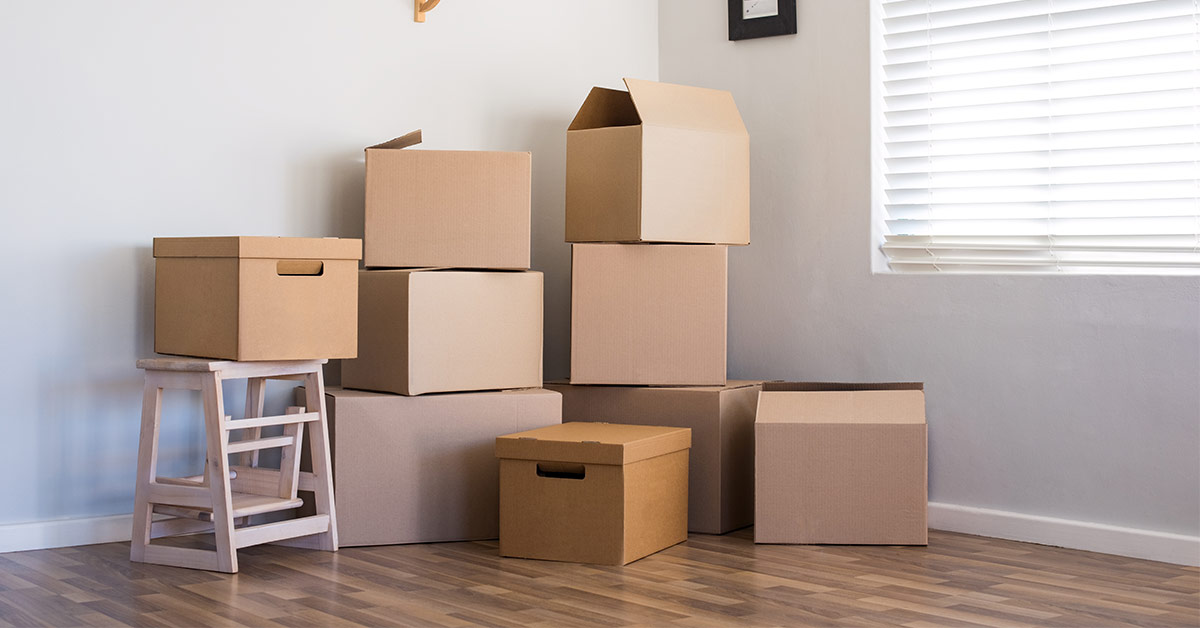
Choosing the right type of moving boxes is integral to ensuring a smooth storage process. Moving and storing your belongings in robust and suitable moving boxes helps make sure that your items are protected during the moving and storage periods.

To help you select the right types of moving boxes, we’ve come up with different moving boxes you can select, and their differences.

Cardboard Boxes

Most of the time, when you think of storage boxes, you think cardboard. Cardboard boxes are the box of choice for many moving and storage situations because they are inexpensive, light, and easy to pack, stack and label. Additionally, when they are no longer needed, they can be easily recycled or broken down for future use.

Plastic Bins

Plastic bins are excellent boxes for storage because they can be easily stacked, and they can better protect your belongings from moisture, heat and anything else that might be trying to get inside. You do not have to worry about packing tape, since plastic bins are self-sealing. While they are more expensive than cardboard boxes, they are relatively more resistant and you can use them for much longer.

If you are renting for short-term storage, you may not want to spend on plastic bins, especially because you will not be able to break them down to store them when they are not in use. On the other hand, if you are seeking long-term storage, plastic bins are a great choice, especially if you are not planning to store them in a temperature-controlled storage unit.

Specialty Boxes

For belongings that are particularly fragile or valuable, consider using specialty boxes, which are specifically designed to safely store a particular type of item. Specialty boxes are useful for everything from storing dishes and holiday decorations, to art and flat screen TVs, and they are available in both cardboard and plastic varieties. One of the biggest benefits of using specialty boxes for storage is that they make difficult things easier to pack, with inserts that keep items from moving and shifting around. They are a bit more expensive than traditional boxes, but they offer added value in convenience and security.

In addition to understanding different box types and their suitability based on your storage needs, it is important to be aware of the various box sizes and select the ones that are best suited for you.

Small Boxes

A standard small box is about 16 x 12.5 x 12.5 inches, or 1.5 cubic feet. They are good for packing up small, heavy items, such as books, that might add too much weight to a larger box with more items in it. They can also be suitable to pack fragile items like dishes and vases. Most small boxes can safely hold up to 60 pounds, but to be safe, it is generally advised not to pack boxes heavier than 50 pounds.

Medium Boxes

A standard medium box is about 18 x 18 x 16 inches, or 3 cubic feet. Use these to store bigger items that do not have to be packed tightly, including clothing, pots and pans, and toys. A medium box can safely be packed up to about 65 pounds.

Large Boxes

A standard large box is about 18 x 18 x 24 inches, or 4.5 cubic feet. They are good for things like linens and blankets, lamps and small kitchen appliances. While these are bigger than medium boxes, they have about the same weight capacity at 65 pounds, so do not overpack them.

Extra-large Boxes

A standard extra-large box is about 24 x 18 x 24 inches, or 6.1 cubic feet. They can carry up to about 70 pounds, but if you fill them up too much they will be extremely difficult to lift, so keep that in mind when packing them. Store the items that do not fit as readily in smaller boxes, like pillows and comforters, winter coats and larger kitchen appliances.

Wardrobe Boxes

A wardrobe box is specifically intended for the easy storage of clothing, and has a bar across the top where you can hang items instead of having to fold them. They come in small, medium, and large sizes – choose your size(s) based on the amount and size of the clothing you will be packing. You can also utilize the bottom of the wardrobe box to store shoes, purses, sweatshirts, or anything else that does not add too much weight.
Do you need moving boxes or moving supplies for your next move or storage? Check out our moving supplies! We offer everything from duct tape and cardboard boxes to foam peanuts!

How to Downsize After Retirement

Many retirees take this time to pick up new hobbies, explore different destinations or downsize to a smaller property. If you’re looking to downsize to a smaller property after retirement, take these six steps.

Yes – you finally made it! No more rushing to work or stressing over deadlines. Now is the perfect phase to relax and live your best life!

Many retirees take this time to pick up new hobbies, explore different destinations or downsize to a smaller property. If you’re looking to downsize to a smaller property after retirement, take these following six steps.

Select where you want to retire

Before moving anywhere, you can first consider where you want to be and what you want to do (or not do) while enjoying retirement. If you are hoping to move away from your current area, consider these questions:

  • Is it important to be near family?
  • Am I seeking adventure or do I wish to relax?
  • Do I want to surround myself with people my age?
  • Do I dream of year-round warm weather or a place that enjoys all four seasons?
  • Do I want to retire in a big city or a small town?

Answering these questions will help you quickly narrow down your options. Once you decide on an area, it is time to proceed to the next step.

Determine how much space you will need

To determine how much square footage you really need, it helps to first think about your current space and how it is being used.

  • Are there bedrooms that are never occupied?
  • Do you find yourself closing off certain rooms in the house?
  • Is your garage utilized?

Thinking about the answers to these questions will help you determine how much space you might really need in your future home. 

Try to be realistic about the amount of space you are going to need. While downsizing certainly has its advantages, be sure you are not over-downsizing. For example, if you plan to host friends and family frequently in your new home, you will need a bit more space – or at the very least, an extra room with a pull out sofa – to accommodate guests. 

You also want to avoid under-downsizing, or purchasing more space than needed. For example, if you plan to travel for much of your retirement, consider buying a cozy, small pad instead of a larger 3-bedroom home.

Find a credible and reliable realtor who knows the area

Finding a quality real estate agent, who knows the area like the back of their hand, will greatly improve your house-hunting experience. This is particularly true if you are moving out-of-province or away from your current area. For instance, if you have decided to retire in Victoria but you have been living in Vancouver, you might not be familiar with the local ethos. This is where an experienced realtor can step in to help you make an informed decision. 

Many times, local realtors can also point their clients in the direction of reputable contractors, repairmen and other skilled home professionals. Additionally, realtors can assist with legalities and tedious paperwork.

Organize and sort through your things

Once you have determined what goes where, you can get started on organizing and sorting through all of your belongings. After all, to live comfortably in a smaller home, you are going to need to purge unnecessary furniture, unused clothing and other miscellaneous knick-knacks. While deciding what to keep and what to toss can be a challenge, these tips and tricks here can help you clear out your home successfully.

Rent a storage unit

If you are ready to get rid of your extra stuff, I recommend investing in a quality storage unit. A storage unit will give you plenty of space to store belongings that you do not want to bring to your new home. For example, you can store old CDs or clothes, bicycles or furniture at a storage unit.

If you have questions about renting a storage unit, please feel free to contact us. We have six storage facilities in Greater Vancouver and on Vancouver Island so please book a storage unit nearest to you!

Find the right movers

Unless you are planning on having a DIY move, you are going to need to hire professional movers. Whether you only need help packing, or are looking for the full service, movers will be able to do as little or as much as you like. 

Fortunately, there are plenty of professional moving companies that can handle the task for you. To ensure that you hire professional movers, make sure to check out the moving company’s online reviews and see their customers’ general consensus towards the company.

Rent a U-Haul Truck

If you plan on moving on your own, you can rent a U-Haul truck. At U-Lock Mini Storage, we have partnered with U-Haul to provide rental U-Haul moving trucks. If you would like to inquire about the truck rental, please contact us and one of our team members will be delighted to answer any questions you have!

8 Amazing Spring Tips You Can Use

Spring is here and it is a great time to tidy up your home and make it sparkling clean! To help you organize, declutter and clean up your home, we have come up with eight tips you can use. Enjoy!

Spring is here and it is a great time to tidy up your home and make it sparkling clean! To help you organize, declutter and clean up your home, we have come up with eight tips you can use. Enjoy!

Store belongings in a storage unit

The most effective way to declutter your home is renting a storage unit. At U-Lock Mini Storage, we have a wide selection of storage unit sizes from which to choose. This means that you can pick a storage unit size that best fits your needs. For example, if you have a couple of items, such as old CDs or clothes, that you want to store for the long haul, you can go with a 5 x 5 feet storage unit, which is approximately the same size of a regular closet. This storage unit can hold personal items, clothes, boxes, skis, children’s toys, small furniture items, business records and sales rep materials. If you have many items you want to store, you can go with the 10 x 15 feet, which is equivalent to two-thirds of a one-car garage. This storage unit can hold appliances, boxes, miscellaneous items and commercial storage inventory.

Clean toasters and tea kettles using cream of tartar

Mix 1 teaspoon of cream of tartar with just enough water to create a milky paste. Rub the solution onto your stainless steel appliances and wipe away to unveil their original shine!

Remove water stains using lemon

Clean your faucets and make them sparkle by rubbing a half of a lemon on the water stains. The citric acid helps remove hard water marks. After rubbing the lemon on the water stains, leave the lemon juice on the surface for a little while, then wipe the lemon juice with a towel and you will see nice and shiny faucets.

Clean your microwave by heating lemon juice and rinds in water

Cut a lemon into halves, squeeze the juice into 1/2 cup of water and drop the rinds into the mixture. Microwave the liquid for three minutes and let it stand for five minutes without opening the microwave door. The trapped steam will loosen the grime, so you can wipe the microwave clean with less elbow grease.

Remove showerhead buildup with white vinegar

Vinegar can dissolve the mineral deposits that accumulate in showerheads over time, causing reduced pressure and water flow. Fill a plastic bag with white vinegar, secure it over the showerhead with a rubber band and leave it soaking overnight to get rid of buildup. You will see all the unknown particles in the bag the next day!

Clean your grill with an onion

Get your grill cleaned up and ready for the warm weather. First, heat it up and spray some white vinegar onto the grates to help loosen the residue. Then, scrub the area firmly using half an onion. The acid from the onion will rid your grill of any leftover grime.

Clean computer monitor with coffee filters

Does your computer monitor show fingerprints, smudges, and dust? You can use the fiber in coffee filters to gently rub the smudges or fingerprints away, even on delicate computer monitors. Just make sure to not press too hard!

Clean air vents using a butter knife

You can use a butter knife – yes, a butter knife – to clear up dust stuck in air vents. To do so, simply wrap the knife in a rag and wipe between the slats. Then, open the windows and run your central air to fill your home with fresh spring air (just make sure your heat or AC is off while you are running the fan).

How to Clean a Storage Unit

Cleaning your storage unit regularly ensures that your belongings are immaculate and that your storage unit is tidy and organized.

Cleaning your storage unit regularly ensures that your belongings are immaculate and that your storage unit is tidy and organized. To help you clean and organize your storage unit efficiently, we have come up with five steps you can take!

Take an Inventory Count of Your Storage Unit Items

The first thing you should do is scan the unit and take an immediate inventory of what is inside. Then, determine if certain items need to remain in the storage unit, or if they can be thrown out of the storage unit.

Consider the following steps to assess a storage unit:

  • Write down what you see. Keep a pen and paper on hand and jot down some large items you can see immediately. Count the number of boxes and write down how many you will need to sort through, in order to estimate how much time the clean-out will take. Will you need extra people? This inventory will help you answer that question.
  • Create an open space inside or outside the unit. If space is limited, carve out one free corner, which will become your processing area for step three. If there is no room inside the unit, you can set up a temporary pop-up canopy and process items outside the space.
  • Having a rough inventory before you start sorting the items will help you know the amount of work you have ahead of you.

Enlist Friends to Help and Plan a Day to Declutter

To lessen your chances of becoming overwhelmed, prepare yourself for what is to come. Pick a time to do the actual clean out and come back equipped with moving supplies, garbage bags, labels, and sorting totes.

Before you clean out your unit, make a mental note of the following:

  • How much time do you need? Overestimate here. You may need more than one day to clean out your storage unit thoroughly. Plan accordingly, so you have all the time you need and more to dedicate to the job.
  • What rules apply to storage unit auctions? If you won the storage unit at an auction, determine how much time you have to empty the unit. You may need to clear out the unit immediately and sort through the items at a separate location.
  • How many people do you realistically need? It may be helpful to have more than one person on hand. Ask for help in advance and be sure to have all the support you need, meaning both emotional support (if you are cleaning out a loved one’s unit) and some extra muscle.
  • ‘Do I have an emotional attachment to any of the stuff?’ Remember that cleaning out sentimental items can be an overwhelming process. This response is natural, so do not beat yourself up if you become emotional if, for example, you inherited a storage unit or used one to store items from a loved one.

Organize Items into Categories Such as ‘Keep’, ‘Sell’, and ‘Toss’

The Four-Box Declutter Method is an effective way to sort through and clean out items on a larger scale. The premise behind this technique is using four empty boxes for sorting — a ‘keep’, ‘toss’, ‘donate/sell’, and ‘store’ box.

  • The keep box includes items you can remove from your storage unit and bring home.
  • The store box sorts things that will stay in storage.
  • You will have a sell box for items you plan to sell or donate.
  • The last box is a toss box, which will include anything that is broken beyond repair.

Stick to the Schedule

The biggest storage unit clean-out mistake is not getting the job done in the scheduled time frame. If you have gone through the above steps and find yourself stuck, you may want to enlist a professional organizer. Someone who cleans out areas for a living will help you stay on track and keep you from getting distracted. Even task-oriented people can get sidetracked!

Professional organizers are especially helpful when cleaning out estates. Since the professional organizer has no attachment to the items in your storage unit, they can help you make rational decisions about whether you should keep, toss, sell, or donate an item in question.

Here are some important pointers to remember while decluttering:

  • Do not take on large areas in a random fashion. Start with one small area at a time and finish sorting it before going on to another.
  • Make sure to have a spot for everything you are removing from the storage unit. If you are cleaning out your storage unit for good, consider relocating storage boxes to a garage or basement.
  • Challenge yourself to get rid of junk and unnecessary items and try not to transport too many items back home. Think about how you can get rid of stuff, without creating a mess elsewhere

Sell Items from a Storage Unit

There are several ways to sell items from a storage unit. You could sell the entire unit through an auction company, or you could sell each item individually.  Craigslist and Facebook Marketplace are examples of excellent online sales platforms where you can sell your items.

Hire a Junk Removal Company if Necessary

There are numerous companies that can help you get rid of storage unit contents without you needing to lift a finger. Hiring someone is especially useful if you do not have someone that can help you out, or if you are not physically capable of cleaning your storage out by yourself.

8 Do’s and Don’ts for Renovating Your Home

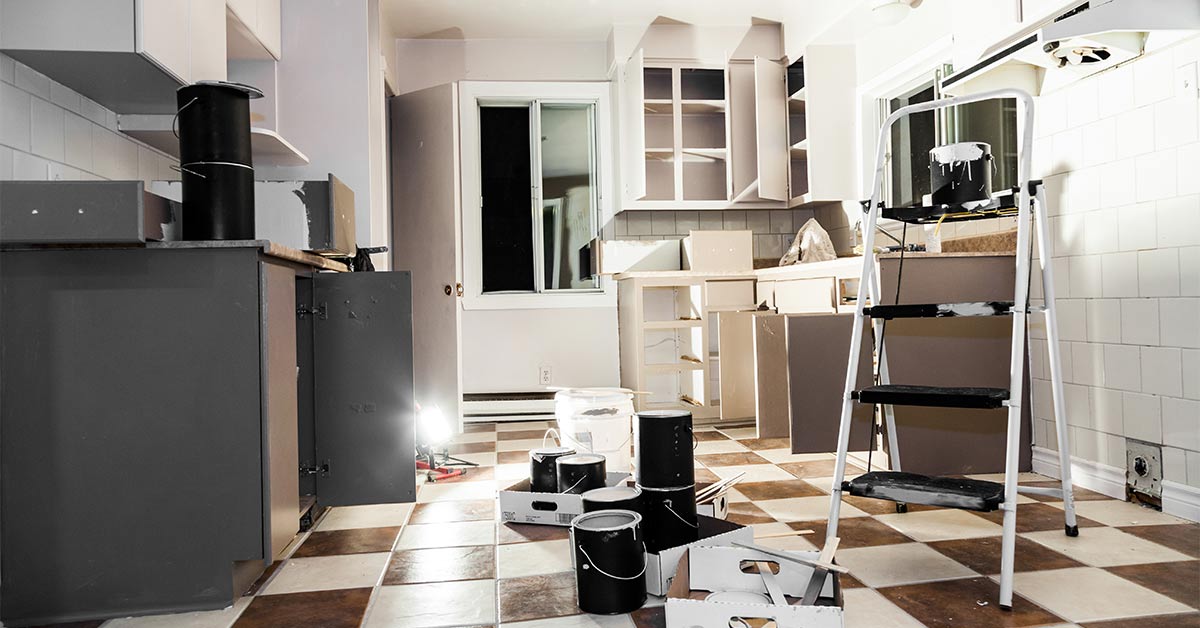
This is the perfect season for renovating your home. As the weather gets better and there is less rain, it is the ideal time to renovate your kitchen, living room, or any interior space that you want to modernize or improve.

This is the perfect season for renovating your home. As the weather gets better and there is less rain, it is the ideal time to renovate your kitchen, living room, or any interior space that you want to modernize or improve. To help you successfully and seamlessly renovate your home, we have gathered eight do’s and don’ts you should follow when you are beautifying or improving your home! Check out the tips:

  1. Create a Detailed Blueprint

From the tiles that will go on the walls to the appliances that will be installed, anyone who has completed a home renovation before knows that it is better to have just about everything picked out before you begin the work. This is because you will need to make numerous decisions once the renovation starts, and the more of those you have made beforehand, the better off — and the better educated — you will be. Online tools like Pinterest, showroom visits, and/or material samples can help, and do not be afraid to start purchasing items to get the ball rolling. 

  1. Rent a Storage Unit

Renting a storage unit lets you protect your belongings and prevent them from getting damaged during the renovation process. Accidental incidents such as paint spilling on your sofa or debris getting on your clothes in the closet are all common and almost inevitable incidents that will occur if you do not store your belongings elsewhere outside your home. By renting a self-storage unit, you can make sure that your belongings are stored in a highly clean and secured place. If you have only a few items to store, you can rent a 5 x 5 feet storage unit, which is roughly the same size as a regular closet. This storage unit size is ideal for storing personal items, clothes, boxes, skis, children’s toys, small furniture items, and some documents. If you have a few more items to store, you can go with a 5 x 10 feet storage unit. This storage unit is approximately the same size as a walk-in closet. This storage unit size is perfect for holding a few pieces of furniture, sofas, chairs, a chest of drawers, boxspring and mattress, business supplies and records, plus other small items and boxes.

  1. Do Not Do It Yourself

Sure, you could tile your own backsplash, and lay your own hardwood floors, and rewire your sound system, but should you? Honestly? While the desire to save money on what is bound to be an expensive renovation is always a draw, when it comes to the bones of your home, and renovations with major ROI potential, it is best to leave it to the professionals. Buyers will be able to spot less than perfect work on your home, and while it may be a point of pride for you, it will be a point of contention for them. You might also be interested in watching and learning.

  1. Make a Realistic Budget

While it goes without saying that any project needs a budget to keep costs in check, it is not always an easy task to find the balance between your dream designs and the amount you have allotted for a project. This is why it is essential to get a true understanding of pricing, on both materials and labor, so you can gauge expectations accordingly. 

Unfortunately, home improvement and renovation television shows can sometimes be misleading in terms of costs, which can vary greatly based on location and timing. Therefore, be sure to have a contractor look over your budget and confirm that it is realistic. 

  1. Hire a Good Team

Whether you decide to hire a general contractor or individual subcontractors for the job, it is important to find the right team to complete your home renovation. While word-of-mouth recommendations from friends might be enough for some, you may also consider doing a full-blown check on your contractor—looking into their license, certificate of insurance, lien history, bond number, and certification—to  ensure you are dealing with a professional who is in good financial standing. Equally important is finding a contractor you get along with and who understands your vision, so it can be helpful to have an interview or preliminary discussion before the formal engagement of services.

  1. Do Not Believe Everything You See on TV Shows

While we are fans of home improvement shows just as much as the next person, oftentimes, many series can make certain projects, such as throwing up a stud wall or installing a new bathroom vanity, seem extremely simple—and they might be for a professional or advanced DIY-er. 

However, if you are considering a home renovation, think practically about what you can and cannot do; painting the walls of a small bathroom on your own may be totally feasible, but painting all of the walls of a 4,000-square-foot house is likely less so. While you may think you would be saving a lot of money by doing the work yourself, if it is something unfamiliar, it might cost even more to have a professional undo your work and then properly complete the project. 

  1. Do Not Follow Bold Trends

Avoid browsing high-end design magazines and websites for inspiration and look to homes on real estate sites for ideas. You will get a better sense of what’s standard on the market, and be less tempted by up-to-the-minute trends whichwill be long-forgotten before you even place the “For Sale” sign on your lawn. 

  1. Prepare to Live Uncomfortably During the Renovation Process

Living through a home renovation can be a trying experience—one that is often filled with dust, exhaustion, and plenty of take-out. Even the most meticulous of contractors cannot keep dust and dirt from flying everywhere, so know that your house will not be as clean as you would typically keep it. Try not to let that bother you, but if you think it will be too much for you to handle, it is not out of the ordinary to rent a place to stay, go on vacation, or live with friends or family for a few critical weeks until your home is a bit more “liveable.”

15 Items That You Should Store In Heated Storage

Heated storage units, often referred to as temperature controlled storage, are  a type of storage unit that is specially designed to maintain steady temperatures and humidity levels.

Heated storage units, often referred to as temperature controlled storage, are  a type of storage unit that is specially designed to maintain steady temperatures and humidity levels. Generally, the temperature will remain consistently between 11 and 13  degrees Celsius. Heated storage is most often found at storage facilities with indoor storage units, such as U-Lock Mini Storage.

Temperature and humidity are important components when it comes to optimizing the climate in a space because temperature and humidity affect moisture levels: more heat and more humidity equal more moisture. Keeping both temperature and humidity controlled and steady prevents the formation of moisture, keeps your items protected and prevents damage from mold or warping due to moisture.

Items that Require a Heated Storage Unit

All items in storage will benefit from a heated storage unit, but some items will benefit more significantly than others. Items that benefit or require a climate-controlled storage unit include:

  1. Media (DVDs, videos, vinyl records, etc.)
  2. Artwork
  3. Clothing, particularly  with lace or leather
  4. Important documents
  5. Photographs
  6. Furniture (anything made of or containing wood, metal, wicker, leather, or upholstery)
  7. Electronics
  8. Antiques
  9. Collectibles (stamps, coins, comic books, etc.)
  10. Medical supplies and medications
  11. Makeup and toiletries
  12. Household appliances
  13. Musical instruments
  14. Sports equipment
  15. Bicycles with leather seats

The reason why these items require heated  storage is their damaging reaction to moisture. For example:

  • Wood can become warped, cracked or rotten from moisture exposure.
  • Leather can become warped or discoloured, and is susceptible to mold and mildew.
  • Electronics can become cracked or rusted, rendering them unusable or dangerous to use later on. 
  • Paper items such as photographs can actually disintegrate or become otherwise indistinct.

If you are not sure if an item needs to be stored in a heated  storage unit, ask yourself the following questions:

  • Can it get mold or mildew?
  • Can it warp, crack, deteriorate or become discolored from interactions with moisture?
  • Would high heat cause it to expand or contract?
  • Is it designed to be stored at a certain temperature (for example, wine or artwork)?
  • Is it sensitive to extreme heat or cold?
  • Is it rare, sentimentally-important, and/or valuable?

If your answer to any of the above questions is yes, you should rent a heated storage unit.

Other Reasons to Rent a Heated Storage Unit

Sometimes the need for a heated storage unit is less about the items that will be stored and more about other factors. Here are some other reasons why you should consider renting a heated storage unit.

  1. If you are going to be storing your things in the unit for a long time. If you plan to store your belongings for several months, a year, or longer, then chances are that the temperature outside is going to vary quite widely in that time. Just because it is 50 degrees and dry outside right now, it does not mean it will be like that later on. Take into consideration what temperature and humidity shifts might occur and, if they might be extreme, go for the heated storage unit.
  1. If you are storing collectibles, valuables, antiques or irreplaceable items. It is always better to be safe than sorry when it comes to your most precious belongings. Things of monetary or sentimental value, as well as items that are antique, irreplaceable, or part of a collection, are all best stored in heated storage units.

How Much Does A Heated Storage Unit Cost?

You can contact one of our mini storage facilities and our staff will be delighted to provide a quote for a climate-controlled storage unit!

Find a Heated Storage Unit Near You

Use our storage unit locations listing to find a storage unit near you. We have three self-storage facilities in Greater Vancouver and three mini storage locations on Vancouver Island. The facilities are:

7 Top Questions to Ask When Renting an Apartment

Renting an apartment is a major decision and requires thorough research before making a commitment to rent an apartment.

Renting an apartment is a major decision and requires thorough research before making a commitment to rent an apartment. To help you assess whether you want to rent a specific apartment, we have come up with seven top questions you should find answers to when planning to rent an apartment.

1. When is the rent due and how do I pay it?

Usually, this is the first question to ask when renting an apartment. You might assume the answer is the first of the month and by cheque. Some landlords require an EFT direct deposit. Others might accept credit cards, but with a fee attached. Some might collect rent on the day you move in or on the 5th day of the month. Whichever one it is, it is best to find out for sure.

Also, make sure you ask about these potential extra costs:

  • Is there a grace period before a late fee is applied?
  • Are there any application fees?
  • Is there an annual rent increase? If there is, how much is it?

2. What is included in the rental cost?

Some apartments include amenities that can offset your overall cost of living. Ask if any of the following are included in your rental.

  • Garbage fees
  • Water
  • Electricity
  • Gas bill
  • Wifi or TV cable
  • Laundry
  • Parking

3. Do I need to rent a storage unit?

If your apartment needs more space for you to store your belongings, rent a storage unit. A 5 x 5 feet or 5 x 7 feet storage unit should be enough for your needs. These storage unit sizes are similar to a regular closet and can hold personal items, clothes, boxes, skis, children’s toys, small furniture items, and some work documents. If you want something bigger, you can rent a 5 x 10 storage unit. This storage unit size is equivalent to a walk-in closet and holds small amounts of furniture, sofas, chairs, chest of drawers, boxspring and mattress, business supplies, and records. It can also hold other small items and boxes.

4. Do I need to have renters insurance?

Some landlords will require you to have renters insurance, which will factor into your overall rent cost.

5. How do I give notice when I want to move out?

When you ask this question,consider the following:

  • What is the timeframe to give notice?
  • What is the security deposit return process? How long until I get it back?
  • Will there be a final walkthrough?
  • Access and tenant responsibilities

6. Will the locks be changed before I move in?

This item is one of the most overlooked, but it is an essential question to ask when renting an apartment. If the landlord says no, demand that they are changed. Also, find out who has master keys to your residence.

7. Is there ongoing or upcoming construction happening at the building?

More construction might mean more noise and less security. Now is also the time to inquire about the security of the property. Are there cameras? Are there lights in the parking lot?

8. Is subletting the apartment allowed?

When you find out about subletting, also ask if you are able to use services like Airbnb in your apartment. Finding out this information helps you estimate the additional income you may generate from subletting the apartment.

9. Who do I contact with issues regarding rent?

Find out if there is a leasing or building manager that you can contact when you have a request, or want to file a noise complaint.

10. Who do I contact for basic repairs?

Who you contact in an emergency, such as a pipe break, might be different than to whom you reach out for a minor maintenance issue, like a chipped floor tile. Find out how you submit maintenance requests.

11. Is there any existing damage to the apartment?

This question is crucial to getting back an honest security deposit. Make sure you insist on a final walkthrough with the landlord or someone on staff. During the walkthrough, make a note with the person accompanying you of any existing damage. Make sure pictures are taken and that there is written documentation of any findings of your walkthrough. Make sure this is filed with you and the landlord. This step will help ensure you do not get dinged on your security deposit return, or get surprise charges for any damage that was already present when you moved in.

12. Where are the fire extinguishers and smoke detectors located?

Safety first! Find out where these items are before you move in. If they are not present, insist that the landlord get them installed before you move in. If the apartment does not look to be up to code, make sure you report it to the city through the proper channels. Once you move in, check out this apartment move-in checklist again for additional guidance.

How to Select a Reputable Moving Company in Greater Vancouver

Choosing the right moving company is an essential step to ensure that your moving process is easy and seamless.

Choosing the right moving company is an essential step to ensure that your moving process is easy and seamless. Picking the wrong movers can potentially delay your moving date, causing you to lose items or incur financial damages. Yikes! 

To make sure that you select the right reputable moving company, you can use the checklist we are providing below. It will save you a ton of energy and money, and it will help your moving process go as planned.

1. Identify The Type Of Movers You Need

Every moving company has a specialty. Some specialize in inter-province moves, while others may only provide their services locally; some might focus on moving delicate objects such as pianos or artwork pieces. Therefore, before selecting a moving company, it is important to first identify your scope of work and the type of moving company you need.

Some questions you can ask yourself to determine your scope of work and the type of moving company you need include:

  • Is my move local, or am I moving across the country? Will I require an inter-province moving company? Would a local company be able to complete the job?
  • Are there any items that require special equipment or skill to move? Some examples include pool tables, pianos, hot tubs, etc.
  • Do I require any other services like packing, trash removal, or a cleanout?

2. Find Potential Movers and Evaluate Their Credentials

While you can find a list of moving companies near you, contact them individually, and see which one fits your needs, you can take a more systematic approach to find quality moving companies and compare them. For example, you can create a blank spreadsheet to list all the moving companies near you and determine each mover’s qualifications and whether they fit the requirements you have set.

For each moving company, create a column for each of the following:

  • Google review rating. See what customers are saying about the business. If a moving company’s Google review rating is low (below 3 stars), or a majority of the comments are negative, you may not want to hire this mover.
  • Years in business. New companies might be less expensive, but companies that have been in business for a long time are less likely to be flight risks.
  • Areas of service. Can this company accommodate both where you live now and where you are moving?
  • License and insurance. Find out if the company has licensing and insurance information on their website. Interstate movers should have the Department of Transportation (DOT) licensing and insurance information listed.
  • Accreditations. Are there any specialized accreditations or certificates on their website that are worth mentioning?

3. Read the Moving Companies’ Online Reviews

In addition to reading Google Reviews and ratings, look at the moving companies’ reviews on other review websites such as The Better Business Bureau, Facebook, Yelp, and other popular review sites. 

4. Request a Virtual Quote

Once you have generated a list of moving companies and narrowed the list down to the top five or ten moving companies, the next step is getting their phone number and getting in touch with them. Many moving companies are offering virtual quotes given the current health situation, making it easy for you to get quotes through their websites. Some information the moving companies may ask you to provide include the number of items you are moving, the items’ weight and the dimensions. You might also need to share a video with the representative of the moving company so they can see the items you want to move and thus be able to give you a more accurate quote.

5. Avoid These Red Flags

Being aware of some red flags during the estimate process can help safeguard you from unreliable movers.

Watch out for the following signs:

  • Low bids. While low costs might be appealing, it can be a sign that the movers do not understand the scope of the project and will cut corners.
  • Large deposits. Generally, a mover should not request more than 20% of the estimate upfront. We recommend never paying more than 20% down, and it is better if the company does not require payment until after the move. If you must make a large deposit for a more complicated relocation, make sure you put it on a credit card – never pay with cash. If something goes wrong, you can dispute the charge with your credit card company.
  • Rented moving vans. Some smaller companies might need to rent moving vans to build up their business. However, these rentals are more common for small moves that include only about one or two pieces of furniture, for example; they are less common for whole-house movers. Reliable companies will have their own moving vans and equipment.
  • Unprofessionalism. Other unacceptable behavior includes showing up for the estimate late, unprofessional demeanor, and any condescending attitudes. You can also check the company’s address to see if it is listed under a residential or commercial address. Commercial addresses are more legitimate because the companies are generally more formally established.

5. Have Everything in Writing

Before engaging in the move, document the terms of your contract in writing. Also, go over the insurance policy the moving company offers. What does the policy cover? How much does it cover? Learn about the difference between full replacement value and other no-cost options that may not include replacement value. Pick the insurance that you feel comfortable with and pay more for extra protection for your more valuable items.

We hope these tips help! Moving is a tiresome task with many potential problems but it can go incredibly smoothly if you follow the advice above. If you have any questions about moving, please feel free to contact us and let us know.

Questions about mini storage? Feel free to call us at 1.866.647.8673 or contact us online at https://www.selfstorage.ca/contact-us and our staff will be more than happy to answer any questions you may have!

Looking to reserve a storage unit? Find a self storage facility near you:

  1. Self storage Burnaby or Vancouver
  2. Self storage Chilliwack
  3. Self storage South Surrey or White Rock
  4. Self storage Parksville
  5. Self storage Nanaimo
  6. Self storage Victoria

What Not To Store In A Storage Unit When Moving to a New Home

wing what kind of items you can put in storage will help you come up with a storage solution that works best for you when you are moving to another home.

Knowing what kind of items you can put in storage will help you come up with a storage solution that works best for you when you are moving to another home. You should also be aware of which kind of items you are not allowed to store in a storage unit. For example, you cannot store food or dangerous items such as guns or ammunition.

Items you should never put into a storage unit for hygiene and safety reasons include, but are not limited to, the items in the list below. You will be responsible for any potential damages to the items and the storage unit if you are not following the storage safety rules.

Food Items

You are not allowed to store any type of food in the storage unit, so do not overlook this safety rule.

First of all, food items left for a prolonged period of time can attract insects or rodents, leading to a much-unwanted infestation problem. The pesky invaders can chew on all sorts of items, nest in them, and destroy your and other people’s belongings in the process.

Secondly, some foods will rot and start emitting bad odours, thus providing favorable conditions for bacteria and mold to grow. In fact, rotting food items can be the main reason for pest infestation.

Plants

Plants are another example of what not to store in a storage unit during a move. If you stored a plant in a storage unit, you would deprive your plants of the three basic things they need to live: natural light (sunshine), water, and fresh air. Depriving your plants from these three elements would essentially end the plants’ lives!

Additionally, plants can attract pests, thus potentially creating significant problems during the renting period. If you want to find a place to keep your plants while you are moving to a new home, we would recommend reaching out to friends or family who can take care of the plants in the meantime.

Dangerous Items, Including Guns

Hazardous materials are another important example of what not to put in a storage unit. Any materials that have the potential to corrode, burn, or explode are strictly forbidden by law to be stored at public storage facilities. The reason is more than clear – they pose a serious risk to human health. Dangerous items can lead to costly property damage as well.

Items that are commonly not allowed in storage units include chemicals, acids, gases, fuel, oils, paints and paint thinners, pesticides, liquor, fireworks, and so on. Request the full list of forbidden items for storage from the storage company you have selected.

You may be allowed to store a variety of yard equipment – your lawnmower, for instance – only after you have removed all the fuel and oil from their tanks.

Furthermore, you cannot store any type of guns and ammunition in a public storage facility. Contact a local gun shop to learn more about where and how you can store firearms safely.

Wet or Scented Products

Never store wet or damp items in a storage unit. The initial moisture in the items will foster the right conditions for mold and mildew to grow, and when this happens, all of your stored items will be in serious risk of getting damaged forever. Hence, make sure all your items are 100% dry before you store them in a storage unit. This tip is particularly important for clothes and shoes.

Scented items such as candles and soaps may attract unwelcome guests, such as insects or rodents. To deter unwanted guests from entering your storage unit, avoid putting in storage anything that gives off strong odors.

High-value or Expensive Items

As a rule of thumb, do not store items that have a high monetary value. Items such as expensive watches, artwork pieces, or jewelry, should not be stored in a storage unit. While our storage units are incredibly secure with 24/7 surveillance, we still recommend storing expensive items in a high-quality personal safe.

If you do not have other options for storing high-value possessions, please inform us about your intention, and we can discuss the need to purchase additional insurance for your prized possessions.

Cannabis

Even though cannabis has been legalized, you are still forbidden to store or grow cannabis in a storage unit.

Unregistered Vehicles

Only vehicles that are registered, fully operational, and have storage insurance are allowed to be stored at a storage facility. This includes cars, vans, SUVs, and motorcycles.

Animals

You should never leave any live animals in your storage unit. It is not only morally wrong, but it is also against the law to do so. Do not ever leave pets or other animals in a storage unit!

5 Tips for Seasonal and Long-Term Classic Car Storage

s by investing in seasonal or long-term car storage (visit our Burnaby and Vancouver car storage and White Rock car storage pages for our car storage solutions).

Classic cars are beloved investments that should be kept in mint condition through the year. One of the best ways to keep your classic car in top condition is by investing in seasonal or long-term car storage (visit our Burnaby and Vancouver car storage and White Rock car storage pages for our car storage solutions). Using car storage assures that your classic car is stored in a safe and secure location and the temperature in the facility is suited for keeping a car in top condition.

Before storing your classic car in a car storage unit, you have to prep your car to assure that it is ready for long-term storage. Here are five tips to prep your car for long-term storage.

1. Fill the Tank & Change the Oil

Fill the tank with premium gasoline and add a fuel stabilizer per the manufacturer’s instructions. The fuller the tank, the less chance excess moisture will build up in open spaces, which can cause the tank to rust.

The fuel stabilizer will prevent the fuel from hardening and gunking up. Make sure you drive the car around for a few miles after adding the stabilizer so it can work itself throughout the system. Then top the tank off before leaving in storage.

Along with fresh gasoline, make sure the oil has been changed and the oil filter has been replaced. Leaving dirty, old oil in your classic car can lead to premature rusting within the engine. Remember to drive the car a few miles immediately following the oil change.

In addition to an oil change and refueling, remove the spark plugs and lubricate the cylinders before long-term storage. You can replace the spark plugs after lubricating the cylinders or keep them in a safe place if you don’t want anyone taking your car for a spin while it is in storage.

2. Get the Car Detailed & Prepped

This step may seem unnecessary and counter-intuitive, but it is important to store a clean and waxed car. Any dust or debris left on the car in storage can scratch or damage the exterior paint, while dirt and crumbs in the interior can attract unwanted pests and create undesirable odors. Before storing your classic car, give it a good, thorough cleaning and apply a protective wax finish on the exterior.

After the car wash, prep your classic car even further by doing the following:

  • Add a box of baking soda to the interior of the car to absorb unwanted smells.
  • Block off the exhaust using steel wool or aluminum foil to deter pests.
  • Lubricate door and hood hinges to keep them from jamming up.
  • Don’t forget the wheels! Make sure they are cleaned and dressed before storage.
  • Use a breathable cloth car cover instead of plastic. Plastic covers can trap condensation that can lead to rust.

3. Fill Tires with Air & Put the Car on Jacks

It is important to properly maintain your tires in storage because they can be very expensive to replace. First, fill up your tires to the maximum suggested PSI. Then, if you don’t plan on driving the car for a while, jack the car up using jack stands. This relieves the weight from the tires and suspension. The added support will also prevent tires from flat spotting.

Quick Tip: If you are storing your car on a dirt or stone surface, be sure to add plywood or another hard surface below the tires. This will protect the tires from ground rot.

4. Address the Car Battery & Fluids

If you plan on storing your classic car long-term, remove the car battery entirely. If the battery terminal is corroded, carefully clean it with a mixture of baking soda, petroleum jelly, and distilled water. Store the battery off the ground in a climate-controlled environment above freezing temperatures.

If you will be starting your car every now and then, consider a battery tender (or trickle charger) to keep the battery functioning over long periods of time. However, this option will only work if you have a power source in your storage area.

Do a quick inspection right before storage and make sure all the fluids are topped off, including antifreeze, brake fluid and transmission fluid.

5. Choose the Right Storage Location

Under ideal circumstances, a classic car should be stored in a clean, dark, and dry space. While it may be tempting to keep your car stored in an inexpensive old barn, the dirt floor and light exposure can be damaging. A garage attached to your home is not ideal either because the constant access exposes your car to the elements.