11 Tips for Spring Cleaning 2022

his an annual ritual or you’re attempting to tackle the process of spring cleaning for the first time, we hope these tips inspire you to create a home you love.

When life gives you lemons, make lemonade. If you’ve been forced indoors by Coronavirus, you’ve been given the gift of time. Pair it with these spring cleaning tips, and you have what it takes to make home a place you’ll never want to leave, even after shelter-in-place orders have been lifted!

We’ve rounded up our favorite spring cleaning tips, plus a tried and true process to get you started. Whether you’re part of the 75% of people that make this an annual ritual or you’re attempting to tackle the process of spring cleaning for the first time, we hope these tips inspire you to create a home you love.

1. Start by breaking out the warm weather equipment

Isn’t it exciting to pull out these reminders of the fun to come this summer? Pull them out and hose them down.

  • Grills
  • Lawnmowers
  • Sports equipment
  • Patio furniture

2. Put away winter

Now that you’ve pulled out your warm weather equipment, you’ve made room to stow away cold weather items. Here are some things you can happily store away in a basement, attic or storage unit until next fall:

  • Heavy outerwear
  • Winter boots
  • Snowblowers
  • Shovels
  • Winter sports gear

3. Switch out linens with lighter fabrics and colors

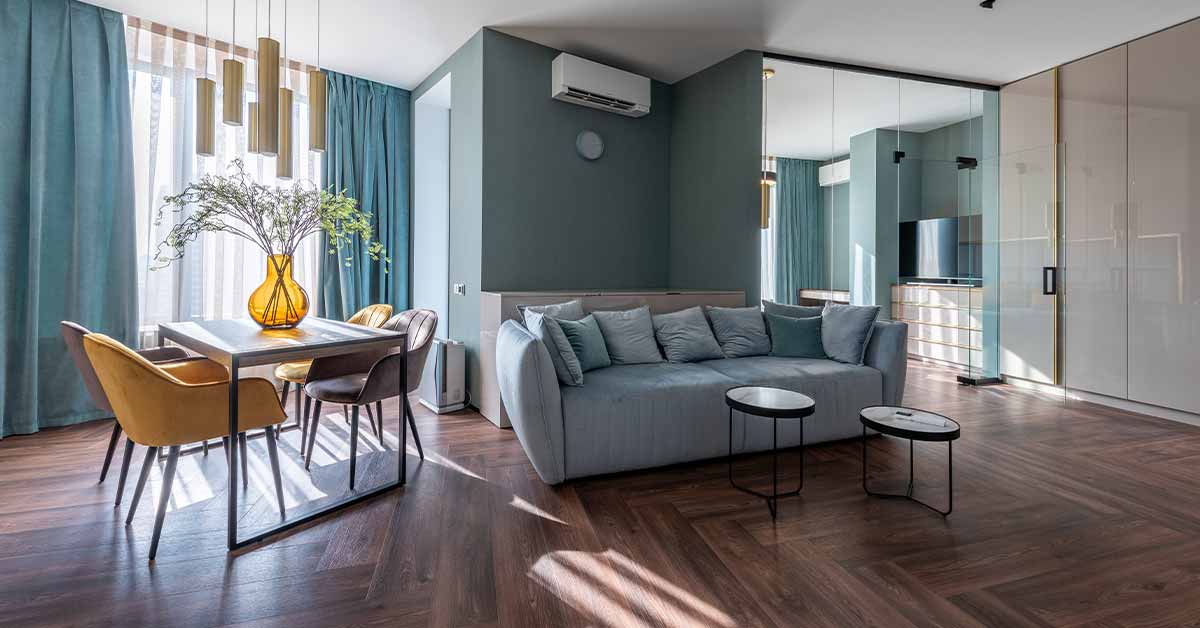
Say hello to spring indoors, too. Put away the heavy bedding, fuzzy throws and velvet pillows to help rid your home of the winter feel. Change up your curtains in favor of a lighter, sheer material to let in more light. Add some plants, mirrors and lighter wall decor to create an open, airy feel for your family and your guests. You’ll immediately feel less cluttered.

4. Switch out your wardrobe

Did you know the average person only wears 20% of the clothes in their closet on a regular basis? If you come across clothing that you haven’t worn in the last 6-12 months, it’s time to get rid of it! Consider donating these clothes to a local Goodwill.

Besides downsizing your wardrobe to make outfit decisions easier, you can take this time to pack up your fuzzy sweaters and bring out the shorts. Here’s a guide to storing winter clothing in the warmer months.

5. Skip the sentimentals

If time is limited for your spring cleaning process, we recommend skipping sentimental items until you can dedicate time to really go through them. After surveying 2,000 Americans on the stuff they store and why, we learned that sentimental connections to our belongings make the decluttering process much more difficult.

6. Dust before vacuuming

In case your mother never taught you this nugget of wisdom, we thought we’d include it in here. You stir up dust as you try to remove it and it will most likely settle on the ground. You can take care of it after dusting by vacuuming (or sweeping).

Baseboards and ceiling fans are two areas that often get neglected when it comes to dusting. They are also areas that collect a disturbing amount of dust. So don’t forget to add them to your spring cleaning list!

7. Don’t forget the windows

Over the long winter months, debris like pollen, dirt and dust can build up along your window sills. Cleaning the interior and exterior on a routine basis will not only let more light into your home but ensure that your windows easily open and close. Fresh air will also reduce allergens and germs in mattresses, even if you can’t haul them outside.

8. Even furniture can use a spring refresh

Just because you don’t see stains doesn’t mean your couch is free of dust, crumbs, dirt, animal fur or allergens. Many hardware stores, including major chains like Lowe’s and Home Depot, rent upholstery cleaning machines, which can help clean your favorite room in a matter of minutes. At the very least, be sure to vacuum upholstered surfaces.

9. Extend the lifetime of your mattress by cleaning and flipping it

Despite linens and mattress pads, mattresses are still popular places for dead skin cells, sweat and dust. First, take a vacuum over both sides of your mattress to collect any dust or debris. If it’s nice enough outside, the best remedy for your mattress is some fresh air and sunlight.

To spot clean a mattress, mix the following ingredients in a spray bottle:

  • 16 oz. hydrogen peroxide
  • 2 tablespoons baking soda
  • 2 drops of dish soap
  • Soak the stained area with the mixture, and let it sit for 30-60 minutes before pressing it off with a clean towel. This solution has been magical for my children’s mattresses!

While you’re flipping your mattress, do yourself a favor and leave it on the opposite side. Over time, pressure leads to irregular wear. Flipping it twice a year can help keep it in tip-top shape while also making sure it’s clean.

10. Wipe down lightbulbs

It may seem like overkill, but it’s really so simple to do. Dirty light bulbs emit 20 percent less light than clean ones. Brighten up your home by giving your lightbulbs a wipe with a damp microfiber cloth. I bet it will take you only five minutes to wipe each bulb in your home. Need to keep a kid busy during quarantine? This is an easy job for any kid elementary-age and up!

11. Use salt and grapefruit to remove grime from showers and tubs

The grit of the salt plus the acid of the grapefruit cut down on elbow grease needed. It’ll also give your bathroom that extra boost of freshness that is usually only obtained with heavily scented candles and not-so-friendly cleaning products.

9 Tips for Organizing Your Kitchen To Maximize Space

Here are our top nine kitchen organization tips to try today.

“Everything in its place and a place for everything” isn’t just a saying Grandma cross-stitched on a pillow. It’s also the best of the kitchen organization tips you can apply. For most people, though, an organized kitchen is a dream to be achieved someday after retirement when the kids have moved out and life is less hectic. Reversing years of bad organization habits seems like too daunting a task to ever really tackle.

But it is possible to keep the heart of your home clear of clutter without spending weeks on boring cleaning projects. It’s time to stop procrastinating, be honest about what you really need, and reclaim the space you use to cook meals and enjoy time with family and friends. Here are our top nine kitchen organization tips to try today.

1. Start by reflecting on how your family uses the kitchen

Today’s kitchen isn’t just for food storage and cooking. It’s often part of your living area and is a multi-purpose space.

Consider all the functions your space serves. You might have a sitting area off the kitchen that comes in handy for entertaining. Does part of your kitchen end up being used as a workspace? Write down the ways that you use the area to ensure that your kitchen organization accommodates the needs of your family.

Here are some common uses for kitchens to think about:

  • Create a place to store items used when entertaining. From a bottle opener and wine glasses to coasters and serving trays, select an accessible spot for your things so it’s easy to welcome friends and family.
  • If your dining area is combined with your kitchen, keep placemats and napkins in an easy to reach spot so little hands can help set the table while you cook.
  • If your kitchen island is often turned into a game area or homework zone, keep favorite games in a nearby cabinet or have a bin with pencils, pens, and notebooks easy to grab.

2. Think like a minimalist

Your first step toward kitchen freedom is to give the whole space an objective assessment. Forget about any sentimentality attached to the items you’ve kept all these years, and give serious thought to what you actually use on a regular basis.

Take a cue from minimalists, people who do their best not to acquire more than they need and to get rid of anything lacking a clear purpose. Apply this logic to your kitchen by:

  • Setting aside your most-used tools and appliances.
  • Identifying duplicates.
  • Determining which single-function items can be replaced or tossed.
  • Throwing out old, broken, rusty, or hopelessly dirty items.
  • This gives you a starting point to work from as you create a plan of attack to organize your kitchen space.

3. Emphasize ease of use

Every kitchen has a few key items used to prepare and eat meals on a regular basis. Put the items you use most in easy-to-reach places to keep from tossing everything out of the way to get to that one bowl you need. Remember the old rule: “Like goes with like,” a key philosophy when it comes to storage units.

Make it as easy as possible to find your favorite items by storing dishes in one place and cups in another, and putting similar preparation tools together. This not only speeds up meal prep and table setting but also streamlines the appearance of your kitchen.

4. De-Clutter drawer space

As you’re rearranging the items you use most to keep the kitchen organized, you’ll inevitably run across clutter in drawers, including the ubiquitous “junk drawer.” Take the opportunity to clear out the messes you find as part of your overall cleaning strategy.

If you need to pop out to the store to grab some inexpensive drawer organizers, do it. These simple plastic or wooden inserts can turn even the messiest drawer into a neat and tidy space. Get one for silverware and another for everyday items such as tape, twist ties, and rubber bands.

Some utensils take up too much space when stored in drawers. Big items such as ladles and potato mashers are better kept on a mounted wall rack or simple suction hangers stuck to the side of a cabinet.

5. Categorize cabinets for better kitchen organization

Keeping with the “like goes with like” rule, move on from the drawers to the cabinets. Pick logical spots for plates, glasses, and mugs, and place all the similar items together. Organizing in this way will unearth some things you haven’t seen in years. If you find something you have little or no memory of using, ask yourself these questions:

  • Do you really need or even want promotional items from companies you rarely do business with?
  • Will you ever use “kiddie” dishes and cups again?
  • Is there any reason to keep lids with no matching pots?
  • Which items can be donated or given away to clear out more cabinet space?

This keeps you in the minimalist mindset and allows you to let go of items you have no reason to keep without the nagging feeling that you might use them at some unforeseeable time in the future.

6. Power up your shelving

Now that you’ve sorted through most of the overwhelming volume of stuff in the kitchen, you should have a good idea of what items you’re going to keep. It’s time to turn your attention to the shelves and see how best to organize this space in your kitchen.

Open shelving creates a sense of light and space and gives you a place to showcase your everyday dishes when not in use. Mix in decorative, functional items like cookbooks, gourmet olive oils, and flowers for an attractive display. Make sure you give these shelves a good wipe-down at least once a month to address dust, grease, and grime.

If you don’t have the space for an open shelf unit, make an effort to empty space on the shelves you do have. Use decorative plates, potted plants, or small appliances to break up larger groups of items and improve the appearance.

7. Make the most of your storage

If your kitchen has deep storage drawers, roll-out shelves, or a swing-out pantry, organizing your kitchen will be a breeze. But don’t panic if your kitchen is not outfitted with these great storage hacks. You can easily find perfect kitchen organization solutions that will help make life easier.

Shelf inserts can be used to create additional storage space, cookware organizers make it easy to grab the pan you need, and a tiered organizer helps keep things visible and organized.

8. Consider the countertops

Your countertop can make a big difference in the way you feel about your kitchen. Clutter-free counters make preparing food and cooking meals easier, and they reduce the possibility of accidents. They also improve the visual appeal of the space.

These kitchen organization tips can help you tidy your counter space:

  • Clean up the sink and counter as soon as possible after preparing food.
  • Store containers of flour, sugar, and other dry goods in cabinets or the pantry.
  • Consider moving knives out of large wooden blocks and into drawers.
  • Put away small appliances, such as the toaster, when not in use.
  • If you don’t have the option of putting everything out of sight, consider mounting as many things off the counter as you can. By mounting things off the counter, the area still appears less cluttered and gives you more space to work when cooking.

9. Make a seasonal storage plan

You don’t need the cookie jar you only use for one month around Christmas cluttering your in-home storage space all year long. Get it out of the kitchen along with those holiday dish towels and fancy serving platters and into a shed or self-storage unit. Keep an eye out for other holiday-specific items, such as cookie presses or candy molds, and store them somewhere else until you actually need them.

When the holidays roll around, get what you need out of storage and wash it thoroughly. Find a good temporary spot for it in the kitchen, and put it back into storage as soon as you no longer need it. Leaving seasonal items out for too long can start the cycle of clutter all over again.

6 Reasons Why You Shouldn’t Live in a Storage Unit

Have you ever wondered if living in a storage unit was legal or not? If you found yourself suddenly without a home due to financial hardship or natural disaster, where would you go? For some, that could mean living with family or friends. For others, that could be living in a storage unit where they keep their belongings. While a storage unit might seem like a viable option, it’s not sustainable or safe.

Have you ever wondered if living in a storage unit was legal or not? If you found yourself suddenly without a home due to financial hardship or natural disaster, where would you go? For some, that could mean living with family or friends. For others, that could be living in a storage unit where they keep their belongings. While a storage unit might seem like a viable option, it’s not sustainable or safe.

It’s illegal

Living in a storage unit is prohibited by various local and federal housing laws. Storage facilities must evict any person they find living on the premises to comply with the law and most insurance policies.

There are good reasons why this restriction is in place. For starters, living in a storage unit is unsafe.

The doors lock from the outside

Most storage unit doors are garage-style roll-up doors that lock from the outside. Also, in many storage facilities, management is tasked with doing multiple walkthroughs throughout their shift to ensure all the doors are closed and locked. This task is performed for the safety of renters’ belongings, but if you’re living inside a unit, there’s a chance you could get locked inside. At best, this could mean you feel slightly claustrophobic for the night. At worst, this could result in fatality.

There are no windows or natural light

Natural light is an essential component of psychological well-being. People living in a storage unit could find themselves depressed, lethargic, and claustrophobic due to their living conditions. This lack of space and light can be especially detrimental to children.

Storage units don’t have running water

If you opt to live in a storage unit, you’ll have to spend most of your day outside the unit or sit inside it quietly and discreetly since doing so is illegal. Either way, you’ll be limited on options for bathing and using the bathroom. Your personal hygiene and health can suffer  without access to fresh, running water.

Cooking inside a unit is a fire hazard

There are a variety of activities that could cause a fire inside a storage unit. One of the most probable is people attempting to use stoves or grills without proper ventilation. Unfortunately, people living in a storage unit are commonly to blame for fires breaking out.

You will get caught

The viral Youtube video above talks about the need to be invisible to be able to live in a storage unit. Most storage facilities are well equipped with cameras and security protocols, so it’s unlikely a person will get away with hiding out in a storage unit for long. Once caught, you can face civil charges and could lose access to your unit and your belongings.
We offer storage solutions to our clients across Greater Vancouver, Vancouver Island and the Fraser Valley with storage units in Chilliwack (Chilliwack U-Lock Mini Storage), South Surrey and White Rock (White Rock U-Lock Mini Storage), Burnaby and Vancouver (Burnaby U-Lock Mini Storage), Victoria (Victoria U-Lock Mini Storage), Nanaimo (Nanaimo U-Lock Mini Storage) and Parksville (Parksville U-Lock Mini Storage).

How to Rent Furniture for Staging

To stage your home, it is ideal to rent elegant, posh furniture. Here are step-by-step instructions you can follow to rent furniture for staging!

Staging a home involves adding beautiful and attractive furniture and accessories in order to accentuate the beauty and size of your home and thus attract potential buyers. To stage your home, it is ideal to rent elegant, posh furniture. Here are step-by-step instructions you can follow to rent furniture for staging!

1. Look Up Furniture Rental Companies in Your Area

Run a search for “furniture rentals” plus the name of your town, city or province. Furniture rental businesses are more common than you might expect, as they cater to businesses, realtors, individual homeowners and even members of the entertainment industry. This means that you are likely to find one near you. For example, you can search for “Burnaby furniture rentals” or “Vancouver furniture rentals”.

2. Visit a Company’s Website for More Information

Pick a rental company from your search results to take a closer look at what they have to offer. Viewing a company’s website will give you a better idea of the exact services they provide, as well as their signature decorating style and general price range. Additionally, look at their Google Reviews or Yelp reviews to gain a better understanding of their reputation and reliability. Finally, compare several different rental companies (assuming you have more than a couple to choose from) to find one that best suits your sensibilities and budget.

3. Call the Company to Enquire about the Furniture

If you like what you see on a furniture rental company’s website, call them and discuss the details of the rental process. A quick chat will give you a chance to learn about the company’s products and policies and ask whatever questions you might have. Some good questions to ask include “Where do you source your furniture?”, “Is it possible to pick out pieces individually?” and “How long does a standard rental agreement last?”

4. Assess How much Furniture You Need

If you are staging your whole house for walkthroughs, you will want to have enough pieces on display to tie each room together. This will call for large, coordinated items like beds, tables and seating areas. If you are only planning on listing 1 or 2 rooms, you can probably get away with renting a single set of furnishings in your preferred theme.

5. Pick out Furniture by Style

The pieces leased by furniture rental companies are typically grouped together as packages based on popular decorating themes such as modern, rustic, urban and townhouse. Browsing by style is probably the easiest way to find furniture that compliments your living space without having to select each item individually. When you shop by style, you will receive a complete set of furnishings that have been curated based on a common look.

Furniture packages are often categorized by room, which makes it possible to mix-and-match different styles between rooms. For example, you might fill your living room with contemporary minimalist pieces and select a rustic French chateau motif for the master bedroom.

6. Compare Items from the Company’s Inventory Individually

Online catalogues, showrooms and stores make it easy to shop for furniture one piece at a time. There, you will find items separated by type, such as beds, sofas, tables, chairs and lighting fixtures. Some companies even stock functional appliances and other accessories like wall art and miscellaneous decorations. Be sure to write down the name or item number of each piece along with its price to keep track of how much you can expect to spend. Picking out furniture individually can be useful when you are sprucing up a room that does not fall into one of the usual categories, or if you want to put your own personal touch on your living space. In some cases, it may be possible to add individual items to a pre-curated package for an additional charge.

7. Shop for Accessories to Provide the Finishing Touches

Before you check out, take a look at some of the decorative items the company has available, like rugs, mirrors, throw pillows, potted plants and eye-catching knickknacks. These items are perfect for giving homes a lived-in quality, especially in cozy, intimate quarters like bedrooms and bathrooms.

Consider spending a little extra on a few wall hangings, sculptures, and other pieces of artwork. The right selections can make any home feel more cultured.

Depending on how extensive a company’s inventory is, you might even be able to find small accessories like woven baskets, candles and flower arrangements for as little as a few dollars apiece.

8. Rent a Storage Unit to Store Existing Furniture

To make room for rental furniture, you can store your existing furniture in a storage unit. You can select a storage unit that suits the number of pieces of furniture you have. Our large storage units start from 8 feet by 13 feet to meet your space needs. If you want even more space, you can opt for our extra large storage units, which start from 10 feet by 21 feet. We are proud to serve clients across Greater Vancouver and Greater Vancouver Island by establishing self-storage facilities in the following areas:

  1. Chilliwack U-Lock Mini Storage
  2. Vancouver/Burnaby U-Lock Mini Storage
  3. South Surrey/White Rock U-Lock Mini Storage
  4. Parksville U-Lock Mini Storage
  5. Nanaimo U-Lock Mini Storage
  6. Victoria U-Lock Mini Storage

Renting a Storage Unit? 6 Things You Should Consider

There are different reasons why you would need a long term storage unit to store your belongings. You could be moving abroad or you might need extra space to store seasonal items around your home, such as skis or bicycles. You may also need extra space for larger items such as your car, boat or RV.

There are different reasons why you would need a long term storage unit to store your belongings. You could be moving abroad or you might need extra space to store seasonal items around your home, such as skis or bicycles. You may also need extra space for larger items such as your car, boat or RV.

Whatever your reason is, choosing to rent a storage unit to safely store and protect your belongings is a good decision. To help you select a store unit that best suits your needs, we have listed six factors to consider and evaluate before renting a storage unit.

The Amount and Types of Items You Want to Store

What items are you planning to store? How many items do you want to store in a storage unit? Answering these questions is critical in selecting a storage unit that fits your needs. 

If you only have a few small items to store, you can go with a more compact storage unit size such as the 5 x 5 feet which is approximately the same size as a regular closet. This storage unit size is suitable for holding items such as personal items, clothes, boxes, skis, children’s toys, small furniture items, business records and sales rep materials. If you are looking for something bigger, go with the 5 x 15 feet, which is equivalent to a large closet. This storage unit holds items such as small amounts of furniture, sofas, chairs, chest of drawers, boxspring and mattress, business supplies and records, plus other small items and boxes.

Safety and Security Features

A storage facility should have robust security and safety measures in place to ensure the protection of your belongings. At U-Lock Mini Storage, all of our self-storage facilities are fully fenced and gated: both exceptional measures to prevent burglary or theft of any sort. 

In addition to a fully fenced with gated facility, we have installed individual alarms for most of our storage facilities. The alarm is triggered when a burglar attempts to forcefully and illicitly enter a storage unit; our security and local law enforcement will be notified of the attempted break-in and attend the respective facility to remedy the issue. We have also installed 4-hour video recording with HD video to monitor and address any suspicious activities 24 hours a day and document all activities near our facilities with our HD video surveillance system. 

This surveillance system further strengthens the security of our facilities and prevents malicious activities from occurring.

Monthly Payment Plan

Determine whether the storage facility requires annual payment or offers a flexible month-to-month payment option. We offer a month-to-month payment option with no long term contract so you are not committed to our storage facility: you have the autonomy to rent a storage unit for as long as you need it. Additionally, we do not require a deposit.

Hours of Operation

What are the storage facility’s opening hours? Is the storage facility open during hours that work for you and your busy schedule? These are important questions to answer before renting a storage unit at a storage facility. If the storage facility’s hours of operation do not meet your schedule, renting a storage unit at the storage facility would be incredibly inconvenient for you.

To learn about our hours of operation, contact our storage facility and our team members will be more than happy to provide this information!

  1. Self storage Burnaby or Vancouver
  2. Self storage Chilliwack
  3. Self storage South Surrey or White Rock
  4. Self storage Parksville
  5. Self storage Nanaimo
  6. Self storage Victoria

The Location of the Facility and Proximity to Your Home

As you begin looking at storage facilities in an area, carefully consider each one’s location and proximity to your home. How important is it to you that the storage unit is located near your house? Are you willing to travel farther for a better or less expensive storage facility? 

While the location of a storage unit may not be an important factor when storing items for a short period of time, it is important when storing belongings long-term. This is particularly true if you plan to travel back and forth between the storage unit and your home to retrieve items regularly.

U-Lock Mini Storage has six facilities in BC. Three in Greater Vancouver and three on Vancouver Island. Check out the storage facility nearest to you!

  1. Self storage Burnaby or Vancouver
  2. Self storage Chilliwack
  3. Self storage South Surrey or White Rock
  4. Self storage Parksville
  5. Self storage Nanaimo
  6. Self storage Victoria

The Storage Facility’s Google Reviews and Ratings

Have you checked the storage facility’s Google reviews and ratings? These reviews and ratings are excellent indicators of the storage facility’s quality.

At U-Lock Mini Storage, we pride ourselves in delivering exceptional storage solutions and customer service to our customers and our Google reviews and ratings reflect the unmatched service.

For example, our U-Lock Mini Storage Burnaby location has a rating of 4.8 out of 5 from 215 Google reviews. The Victoria storage facility also has a 4.8/5 rating from 151 Google reviews.

Questions? Feel free to call us at 1.866.647.8673 or submit a contact form at https://www.selfstorage.ca/contact-us and our staff will be more than happy to answer any questions you may have!

Want to reserve a unit at a storage unit rental facility near you? Check out our self storage facilities:

  1. Self storage Burnaby or Vancouver
  2. Self storage Chilliwack
  3. Self storage South Surrey or White Rock
  4. Self storage Parksville
  5. Self storage Nanaimo
  6. Self storage Victoria

Sharing is not always Caring: Why You Shouldn’t Shared Storage Units

While growing up did your parents constantly remind you that “sharing is caring”. For the most part that is absolutely the case. But for a storage unit, that might not be the right answer.

While growing up did your parents constantly remind you that “sharing is caring”. For the most part that is absolutely the case. But for a storage unit, that might not be the right answer. Sharing a storage unit can save you money, however, there are various problems with sharing a storage unit with others. Here are the top four reasons why you shouldn’t share a storage unit.

Security

When you sign up for a storage locker there is only ONE person who has signing authority.

That person can grant access to whomever they see fit. If you have your belongings in there and you are not the signing authority, there is a possibility of people you aren’t comfortable with accessing your space.

Organization

Isn’t it annoying when you can’t find what you are looking for? Now imagine looking when your stuff is mixed in with someone else’s. Having your stuff together may make it more difficult to locate the item you are looking for, and things might get mixed up when you eventually vacate the locker.

Convenience

Lost your key? Want to transfer to a different unit? Only the person with signing authority can request a lock cut, or transfer units. If they are not available, then you will have to wait until they are.

What if?

What happens if you have a falling out with your locker partner, and you are not the one with signing authority?

Whoever’s name is on the lease can change locks and deny entry to anyone. Without their OK there is nothing storage staff can do to ensure your belongings are returned to you.

If you have any questions about booking a storage unit in one of our mini storage facilities, please get in touch and one of our team members will be more than happy to help!

Our self storage facilities are:

  1. Self storage Burnaby or Vancouver
  2. Self storage Chilliwack
  3. Self storage South Surrey or White Rock
  4. Self storage Parksville
  5. Self storage Nanaimo
  6. Self storage Victoria

Storage Unit 101: 5 Tips for Storing Your Belongings

home. You can store items such as old clothes, CDs, furniture, bicycles and many more!

A storage unit is perfect for storing items that you do not need around your home. You can store items such as old clothes, CDs, furniture, bicycles and many more!

Whether you are storing your belongings for a long or short term, it is vital for you to properly organize your belongings in the storage unit so you can easily find and retrieve the items down the road. 

To help you organize your items in a storage unit efficiently, we have come up with seven tips you can use:

Create a List of All Inventory

When placing a lot of items in storage, it is difficult to remember all of them. While large furniture pieces such as a bed or sofa are easy to remember, smaller items such as artwork, pictures, electronics and clothes are oftentimes forgotten after months in storage. To keep everything organized, you can create and maintain a list of all items stored inside the unit. 

As you begin the packing process, we recommend registering each item in a spreadsheet. Taking photos of stored items is also a great way to keep up with what is in your storage unit. Be sure to save all photos and inventory descriptions in one place. It is also a good idea to create some sort of map that indicates where your belongings are located within the unit. 

Disassemble Furniture and Store Items Upright

To maximize space and organize more efficiently, disassemble large furniture items prior to placing them in storage. This includes taking apart headboards, bed frames and mattresses, as well as disassembling table legs, among other items. We recommend storing individual items in a vertical position towards the back of a storage unit (except for mattresses, which should be stored lying flat). By storing furniture, such as headboards, upright and on the side, you will open up more floor space for other items.

Store Large, Heavy Items on the Bottom Towards the Back

As you begin packing items inside the storage unit, start with large, heavy belongings such as furniture and heavy boxes. Place them towards the back of the storage unit at the bottom. Remember that heavy items should always be stored at the bottom of the storage unit to create a stable base for lighter items.

Place Items You Need More Frequently Towards the Front

Chances are, there are some items you plan on using more frequently than others. For instance, that extra bed you no longer have room for likely will not see the light of day for a while – whereas your baby’s pack ‘n’ play will. 

Other items that you are sure to need more often include seasonal clothing such as heavy coats, boots, hats, flip flops and swimsuits. While you will not need these items every day, you will be making trips to the storage unit to retrieve them at least once a year. These types of belongings should be placed towards the front of your storage unit in well-labeled boxes or bins. Placing them in an easy-to-reach spot near the door will save you the trouble of having to dig through mountains of boxes every time you go to the storage unit.

Stack Vertically

When packing and organizing your storage unit, you should go vertical with your belongings. Boxes should be stacked high and furniture should be stored upright. If you happen to be storing bookcases or anything with shelving, take advantage of the extra storage space. 

To make room for smaller boxes and belongings, consider adding wire shelving or hanging shelves in the storage unit. If the storage unit is particularly high, you may want to consider keeping a foldable ladder or step stool inside the unit with your belongings.

Label Everything

It is incredibly important to label every box and bin inside a storage unit. You may think you will remember where you put those family photo albums – but trust us – you will not especially if they have been sitting in storage for a long period of time. Label every box clearly with either a permanent marker or printed labels. Make sure the labeled part of the box is facing the front of the storage unit, so you can see it upon entering.

8 Storage Tips for Organizing Your Closet

If you are like most people, your closet is one of the last areas to get the attention it deserves when it comes to home organization. To determine whether it is time for you to organize or clean your closet, here are three major indicators that your closet needs an intervention:

If you are like most people, your closet is one of the last areas to get the attention it deserves when it comes to home organization. To determine whether it is time for you to organize or clean your closet, here are three major indicators that your closet needs an intervention:

  • You find it easier to buy a new thing than looking in the closet for the existing version.
  • You are collecting piles of items around the house that theoretically belong in the closet, but there is just no room anymore.
  • You are using external wardrobes or clothing racks as a closet addition, or worse, a total replacement.

If this sounds familiar, you probably have a closet crisis on your hands. You may have spent months or years avoiding the issue, but, as you have discovered, it only gets worse over time! 

To restore a healthy relationship with this all-important storage space, you will need an advanced approach to closet maintenance. This means decluttering, moving things around and, more importantly, optimizing the way you use the space. To help rehabilitate your closet, here are eight easy and affordable hacks you can use!

1. Organizer Baskets

These come in all sizes, shapes and colours, so you are bound to find baskets that match your taste and fit nicely onto your shelves. If you get sturdy ones, you can stack them up like boxes.

2. Towel Bars and Hooks

Although you normally would not need towel bars and hooks in a closet space, a towel bar is a great way to store scarves and neckties without wasting a hanger. You can use durable coat hooks to hang bags, head gear and belts on the back of the closet door.

3. Extra Hanger Bar

An additional hanger bar that hangs from the original one increases the available space. An extra hanger bar is a handy extension for shorter items like shirts, folded pants or skirts.

4. Additional Shelving

If you have the room, mount an extra shelf or two above the hanger bar, or on the sides of the closet. Additional shelving provides a good space to keep items neatly stored out of the way and off the floor.

5. Shelf Dividers

Get these to create unique storage spaces on your closet shelf. Shelf dividers help you separate items and keep piles neatly stacked, without spilling or collapsing.

6. Hanging Organizers

Made from cloth or plastic, a hanging organizer can be suspended from the hanger bar. It will automatically give plenty of new cubbyholes to stash items you do not want to hang, like sweaters, jeans or extra household linens.

7. Transparent Containers

When your organizer containers are transparent, it just makes it that much easier to find what you want at a glance. You can safely eliminate the hassle of opening each one and digging through them to find things.

8. Rent a Storage Unit

Virtually every closet contains seasonal or seldom-used items that you really do not need in the house all year round. 
One of the best ways to keep a closet neat and organized is to make enough room for the stuff you only use on a regular basis. You can put the rest of your items away offsite in a storage unit. You can rent a 5 by 5 feet storage unit, which is equivalent to a regular closet. This storage unit size can hold personal items, clothes, boxes, skis, children’s toys, small furniture items, business records and sales rep materials, for example. If you want something bigger, you can go with a 5 by 10 feet storage unit, which is equivalent to a walk-in closet. This storage unit holds items such as small amounts of furniture, sofas, chairs, chest of drawers, boxspring and mattress, business supplies and records, plus other small items and boxes.

5 Storage Unit Tips for College or University Students

With summer quickly approaching, college students are preparing to pack up their dorm rooms. The problem: driving a car’s worth of household items to their parent’s home. It is just not feasible. So what can a college student do?

With summer quickly approaching, college students are preparing to pack up their dorm rooms. The problem: driving a car’s worth of household items to their parent’s home. It is just not feasible. So what can a college student do? 

Thankfully, summer storage for college students is affordable and easy to find. In fact, renting a self-storage unit for the summer is an especially cost-efficient way for college students to store all of their dorm room and apartment belongings. Below, we have included a guide to summer storage for college students, as well as a list of self-storage facilities to check out this summer. Best of luck and happy moving!

Why Do College Students Need Summer Storage?

Storage units typically provide the perfect amount of storage space for dorm room and apartment-size belongings.

Therefore, students are able to store their belongings near campus, making it easy to move in and out whenever they wish. Instead of hauling their belongings home every summer, they can simply drop them off at a self-storage unit for safe-keeping during the summer months. Not only will this prevent students from temporarily junking up their parent’s garage, but it will also make their move off campus an overall smooth experience.

What Size Storage Unit Is Ideal for Students?

Most storage units are capable of holding at least one room of furniture. Students living in a two or three-bedroom apartment can also find storage units large enough to accommodate more furnishings. The majority of college students can get away with renting a 5×5 or a 5×10 feet storage unit. The 5×5 storage unit is capable of holding a love seat, boxes and home décor, while a 5×10 storage unit is capable of holding a sofa or twin bed, as well as décor and smaller furnishings. 

Who Will Benefit the Most from Renting a Storage Unit?

Students who benefit the most from renting a storage unit during the summer are those that live far from home and/or are studying abroad during the summer or fall months. If this sounds like your situation, we highly recommend renting a self-storage unit while you are gone. Not only will renting a summer storage unit near campus make moving back home easier, but it will also save you from wasting countless hours packing and shipping your belongings across the country. 

How Much Does Summer Storage for College Students Cost?

The cost of summer storage is typically based on the size of the storage unit needed, as well as the length of time rented. Most self-storage facilities offer contracts on a month-to-month basis and the price of renting a storage unit ranges anywhere from $12 a month to $100 a month or more. However, many storage facilities offer special student discounts to college students.

Where Can I Book a Moving Company?

You can find a great selection of moving companies in Greater Vancouver and Vancouver Island by performing a quick Google search. You can find a quality, professional moving company, you can use the tips provided in our article, How to Select a Reputable Moving Company in Greater Vancouver.

Alternatively, you can rent a U-Haul truck directly from U-Lock Mini Storage if you would like to move your belongings yourself. To learn about our U-Haul rates, please contact a storage facility near you!

4 Benefits of Using A Storage Unit for Your Business

panies of all sizes can benefit from a storage unit, whether they are planning to relocate or just need a little extra room. Here’s how a storage unit can help your business stay organized and secure.

Companies of all sizes can benefit from a storage unit, whether they are planning to relocate or just need a little extra room. Here’s how a storage unit can help your business stay organized and secure.

Safety and Security

You want peace of mind when you are running a business. You want to know that everything is in its right place and that it is secure. Storage units provide a safe and temperature-controlled environment for your most important business documents, furniture, and inventory.

Many storage units provide extended access hours, sometimes even around the clock, meaning that you can get what you need even outside of regular business hours. But having convenient access does not mean that just anyone can come into your unit; you can expect surveillance cameras and secure entry. You can trust that your belongings are safe from theft with the highest level of protection.

Save Money with Storage

Renting a business storage unit can save your business money. Many businesses cannot afford to pay rent in a building to store large equipment and documents. Fortunately, businesses can use storage units temporarily or to protect office items for an extended period of time.

Based on the time frame you require for your storage needs, some storage companies allow you to prepay in monthly blocks for added discounts.

A unit can also save your business money on office space. Instead of upgrading to a larger office, you can store items you do not need regularly, and thus remain at your current location. Some smaller businesses find that they do not need some of their office space at all when they put their items in storage. Many storage units offer month-to-month agreements, so you are not bound to a long-term commitment. You get the flexibility you need as your company grows and shifts.

Storing Documents

Running a business involves mountains of paperwork. It is a fact of life. A unit can be your deposit place for documents you do not need to access regularly, such as annual performance reviews and yearly tax files. Historical records like job applications and customer logs could also go in the unit. Moreover, a storage unit is a great offsite protection option for sensitive documents that might contain employee names and ID numbers.

Storing Furniture

A clean office is a happy office. Furniture storage can reduce the amount of clutter in your workplace. You can also store furniture or equipment that is only used by temporary employees or interns. Additionally, it is helpful to store furniture while the office is being painted or remodeled. 

When you are putting office furniture into storage, make sure to protect the sides and corners to prevent damage. Consider using the desk drawers to store smaller items for additional storage space.